 1. Excitement – When a plan is made to make this dish, every foodie at home remembers the excitement of that time when someone said – “I will make Chicken Keema tonight.” At that very moment the mood becomes completely happy even before the stomach.
Think for yourself – soft minced chicken, thin masala, and buttery finish – has any other dish given so much excitement?
 2. Satisfaction – When the spices are properly combined
The most satisfying moment in a chicken keema recipe is when the onions and tomatoes are perfectly cooked. When the aroma spreads in the kitchen, you feel – yes, now something special is being made!
This step decides how rich and flavourful your dish will be.
 3. Anticipation – When the chicken mince is simmering
When the minced chicken is well combined with the masala and is lightly simmering in the pan – waiting for that moment is different.
Steam is seen coming out of the eyes and you feel – “Just 5 more minutes…” 
 4. Craving – When it’s time to garnish
Finally, when you add some butter, lemon juice, and fresh coriander on this dish – then the craving is at its peak.
Along with that golden shine and spicy aroma, only one thought comes to mind – bring the plate and come quickly! 
 5. Pride – When everyone praises you
When family or friends take the first bite and say – “Wow, what a wonderful thing you have made!” – the pride that one feels then has no comparison.
When people are impressed by making this dish, then one feels that one has got the real feeling of being a chef.
 6. Comfort – When chicken is connected to the memories of home
For many people, chicken is not just a dish, it is an emotion. The taste of mother’s hands, childhood Sundays, or memories of hostel life – chicken is a comfort that no other dish has.
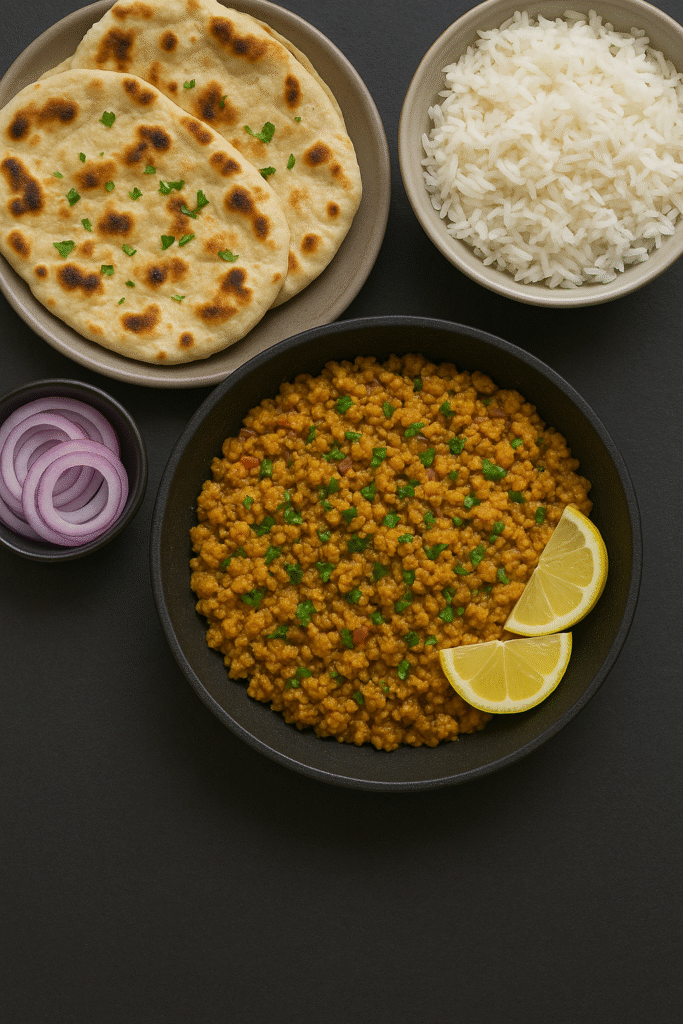
A bowl of chicken + hot roti = home
 7. Happiness – When you take your first bite
The biggest emotion comes when you take your first bite… hot chicken meat, soft texture, balanced spices… and it comes out from the heart – “It was fun!”
 Step-by-Step Cooking Guide: How to Make
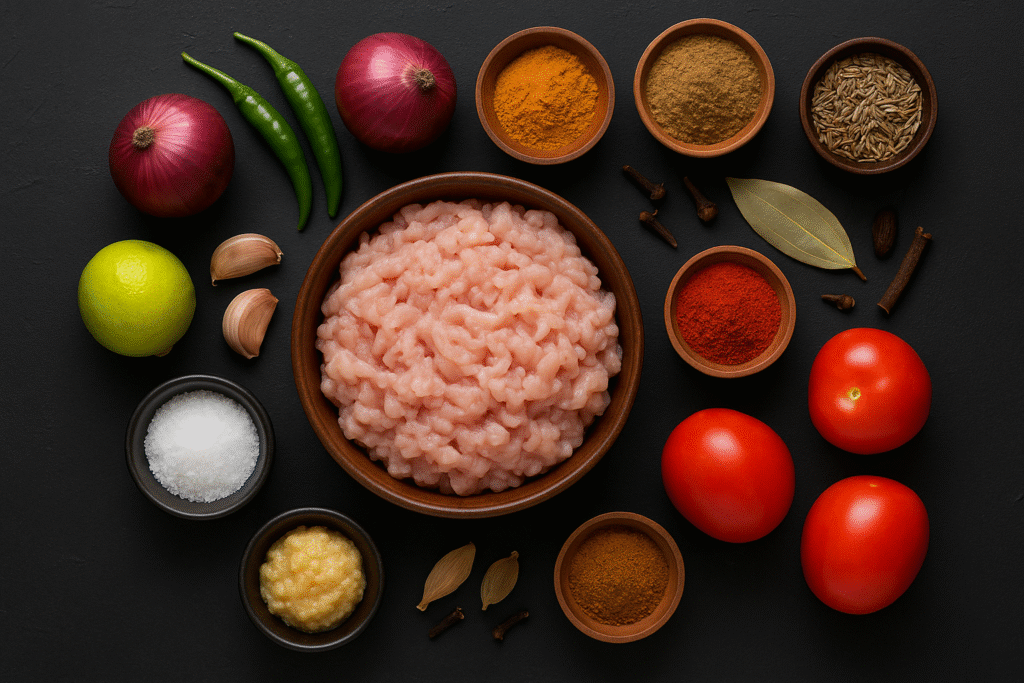
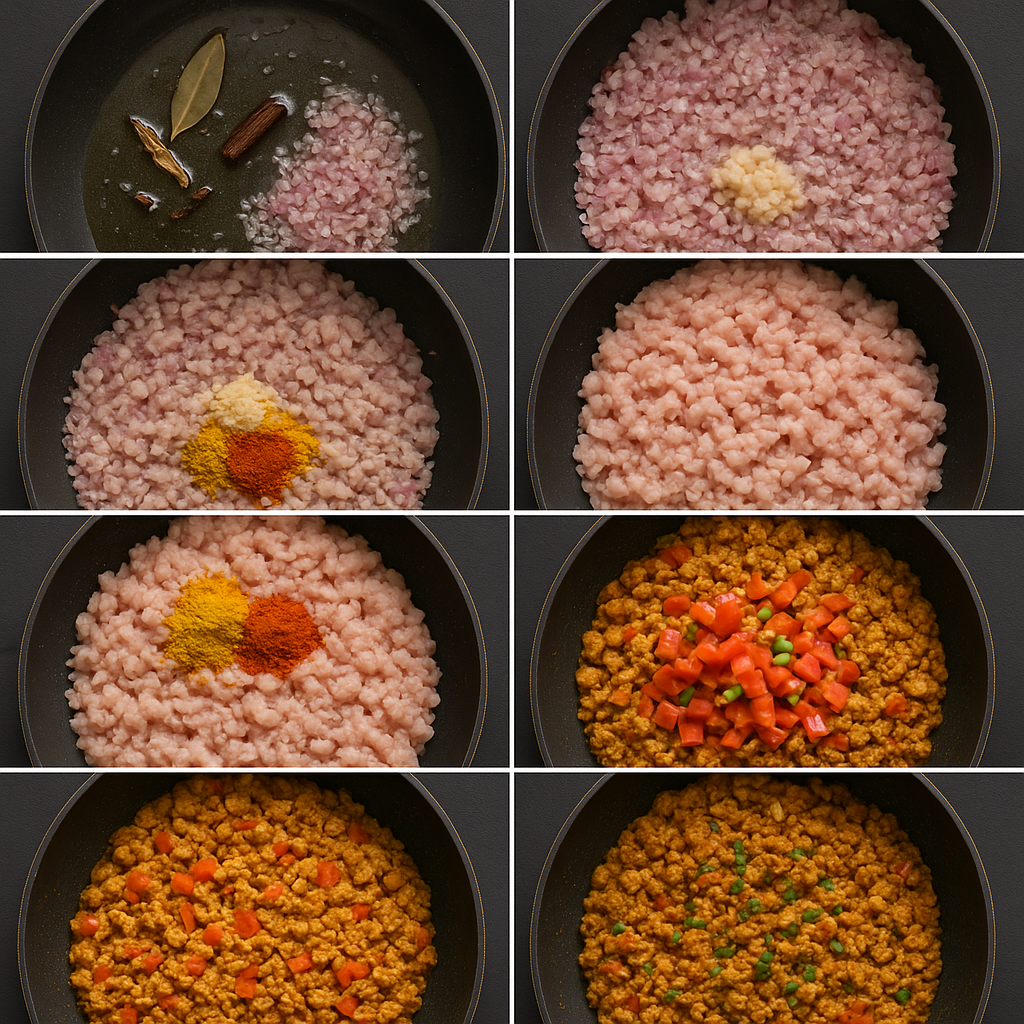
Step 1: Oil and Whole Spices
Heat oil in a pan. Add cumin, bay leaf, cloves, cinnamon, and black cardamom and fry for 30 seconds.
Step 2: Onion + Ginger-Garlic
Now add onions and fry till golden brown. Then add ginger-garlic paste and green chillies and fry for another 2 minutes.
Step 3: Tomato Puree + Spices
Now add tomato puree. Add turmeric, red chilli, and coriander powder and mix well. Fry for 6-7 minutes till the oil starts separating.
Step 4: Minced Chicken
Now add minced chicken. Fry on high flame for 5 minutes till the colour changes. Then cover and cook on medium flame for 10-12 minutes.
Step 5: Final Flavours
Check the salt, add garam masala, garnish with fresh coriander and sprinkle lemon juice. That’s it – your dish is ready! 
How to Serve this dish?
 Creative Ideas :
 Healthy Version
If you want to make healthy version:
Healthy Version
If you want to make healthy version: